In MMLS, you have full control over the aim offset at any time, even while moving. Making the aim offsets is really not that hard, but it will surely have a huge impact on the realism of your game. It will also make your game truly unique by adding a personalized touch to all the animations you are using.
In this guide we will demonstrate how to make an aim offset for blocking with a shield. In our weapon blueprint, we change the anim stance to Aiming while blocking(right mouse button). This allows us to use the full animation set for Aiming, so you can possibly block at absolutely any time if you want to, without having to play a montage.
Combine this with the updated server-side shield location (see BeginPlay of BP_GoldenBuckler) logic that we have and you can basically build one of the most realistic blocking system out there. The player actually has to aim the camera to block incoming hits! Play a recoil montage on the LeftArm slot (assuming its in the Offhand) and it should be it.
In theory you can even play a melee attack montage(PreAO UpperBody Slot) at the same time as you are blocking (since the blocking is not a montage, but an anim sequence) and still get the recoil on the left arm if you are hit on the shield while swinging your weapon. We will be expanding on this in future updates.
We will go really slow in this guide to make sure eveyone can do it. Let’s get started!
-> If you don’t have MMLSE, this is how the input was handled.
Step 1
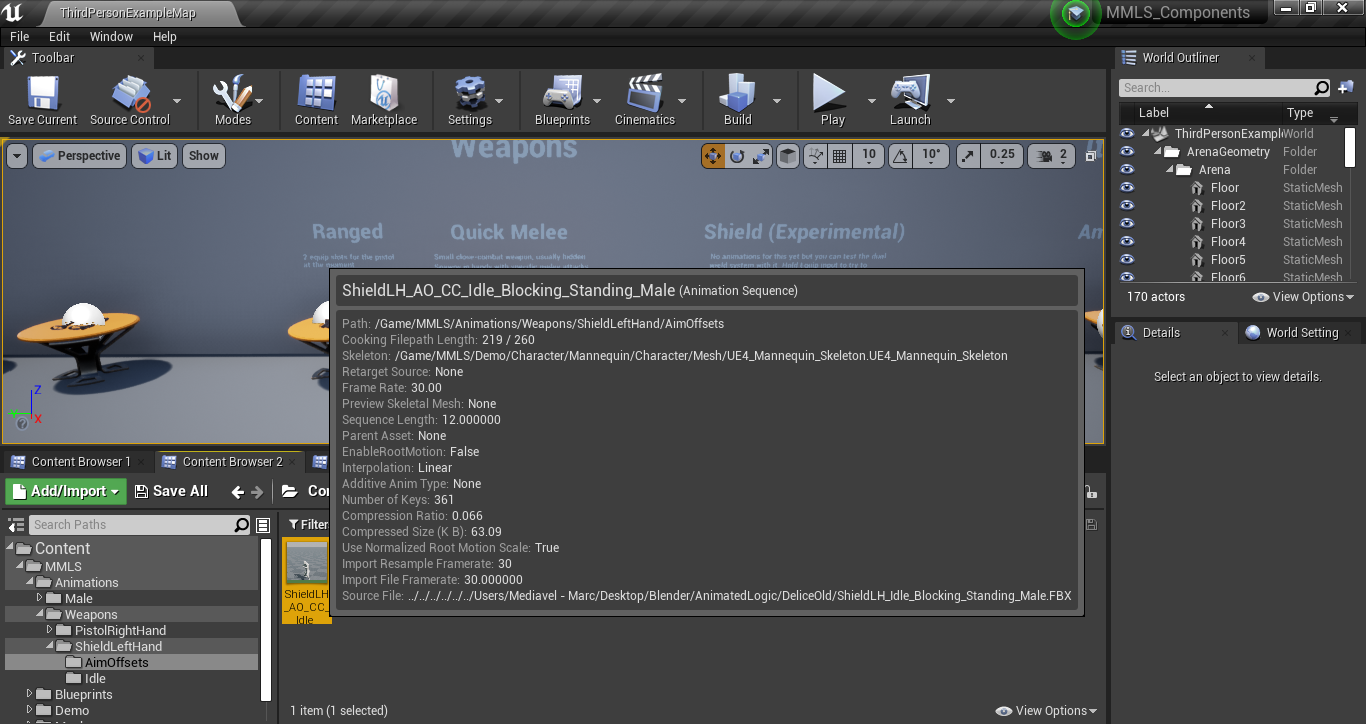
Add animations to your weapon
1. Go in your weapon blueprint and navigate to Weapon Animations.
2. Here you can decide if you want to use the lowerbody animations from MMLS or not. If you want the complete anim sequence to play, place your Idle animation in Upperbody and in Lowerbody. Only place it in Upperbody if you want to use the lowerbody anims of MMLS(empty handed). This also applies to all movement animations. Might be useful if you are stuck with some bad animations and just want the upperbody from them.
Step 2
Duplicate your idle animation
Add AO_CC and move it to a new folder if you want to.
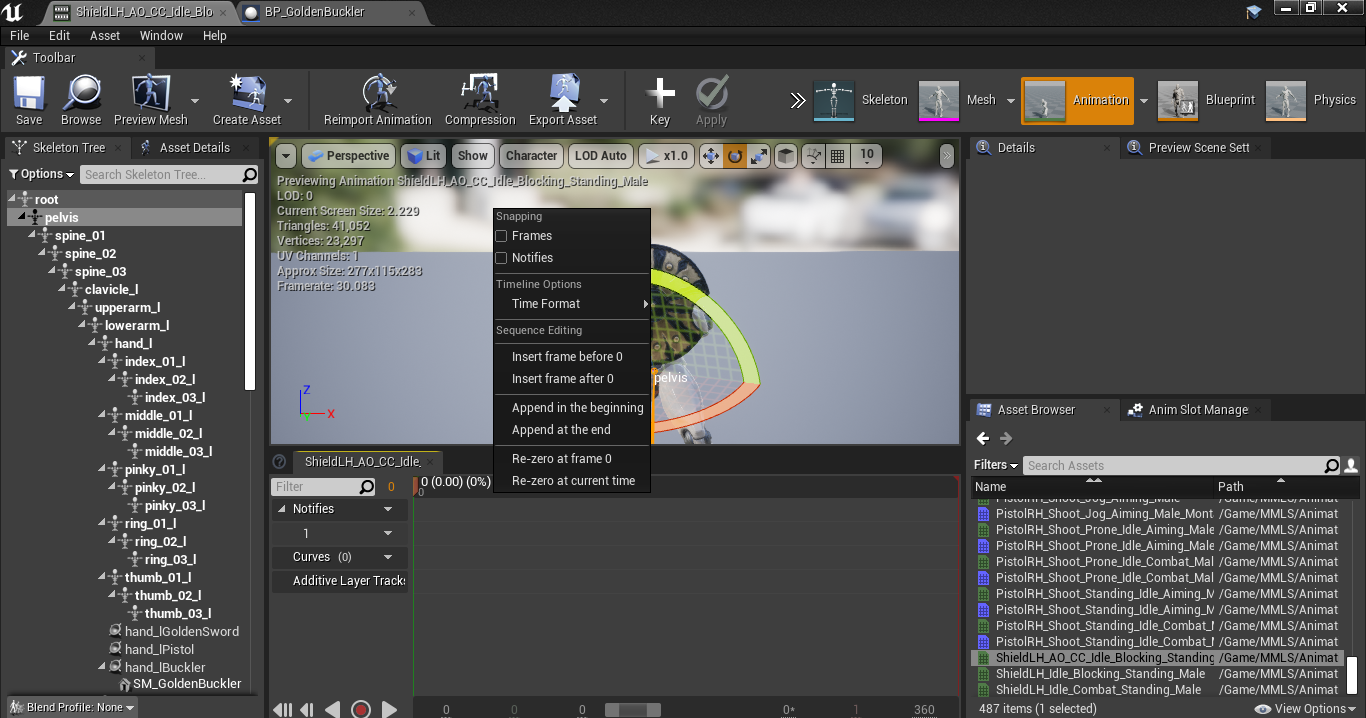
Step 3
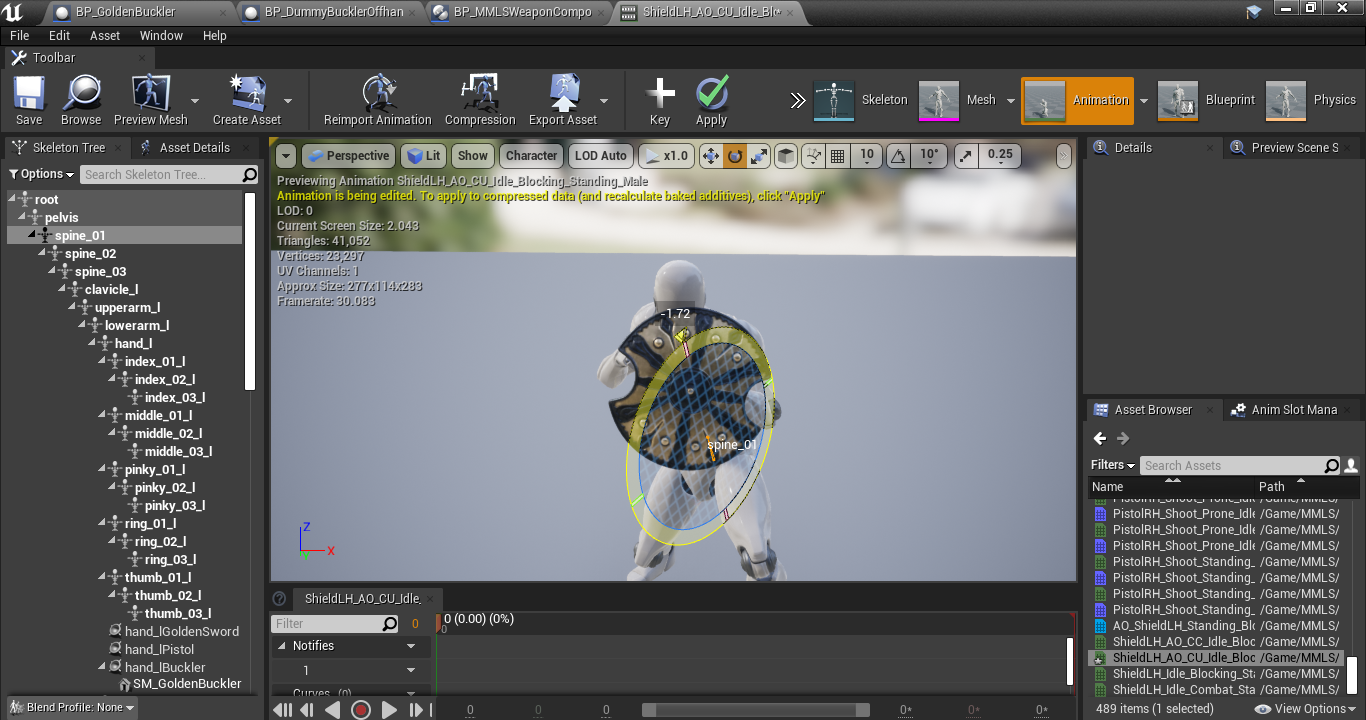
Make a pose
Place the marker at time 0 and right click to remove frames until you have only the first one.
-> Click on Remove from frame X to X under Sequence Editing (the 2nd one).
Step 4
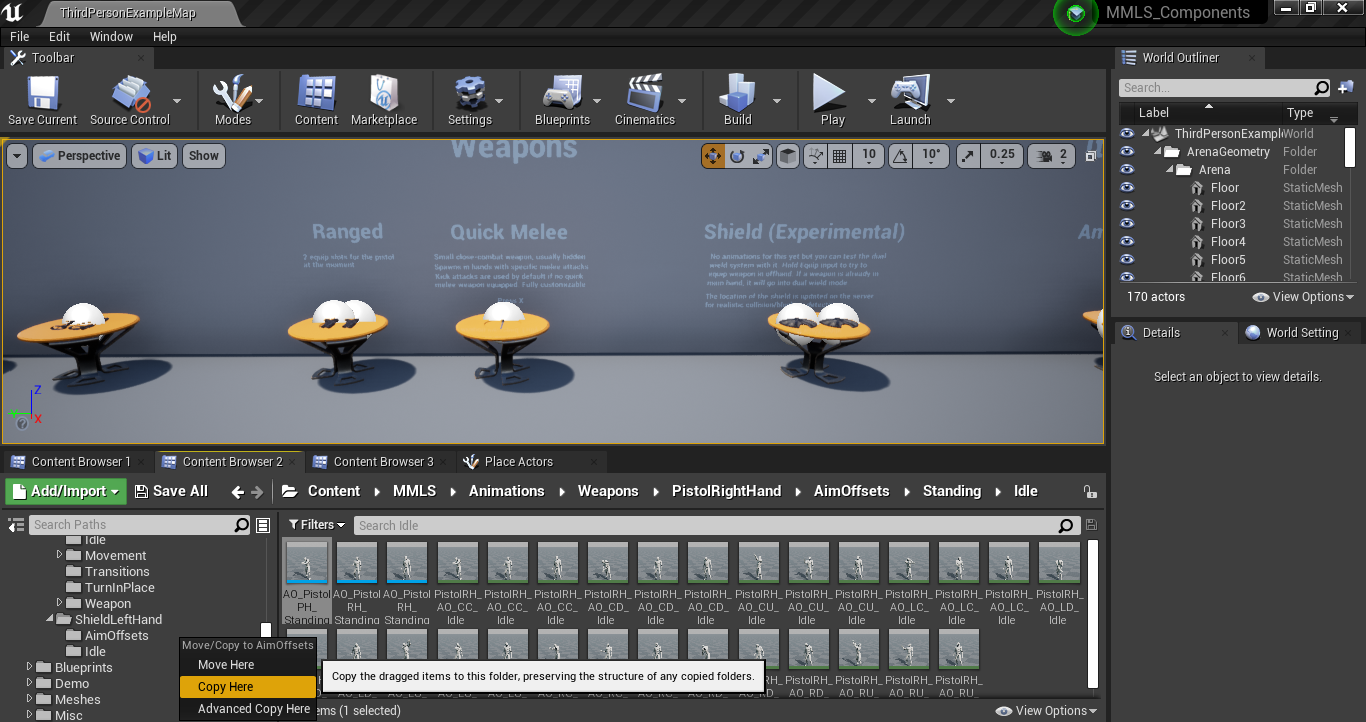
Copy the aimoffset from Pistol Aiming or make a new one. If you make a new one, the horizontal axis by default for MMLS is -+75 degrees and -+60 degrees vertical while standing.
This is used in the Anim BP and has to match to be realistic.
-> Turn your character so he looks at approx 75degrees in the left/right aim offset poses.
-> Make your character look up/down to approx 60 degrees in the up/down aim offset poses.
The character will turn in place at 75 degrees Yaw Offset and the aim pitch is clamped to -60/60 while standing. This is where the values come from.
If you did copy an existing Aim Offset like we did, delete all the animations in it.
*Add the new aim offset you created in your weapon blueprint at the right place (Aiming -> Standing Idle in our case).
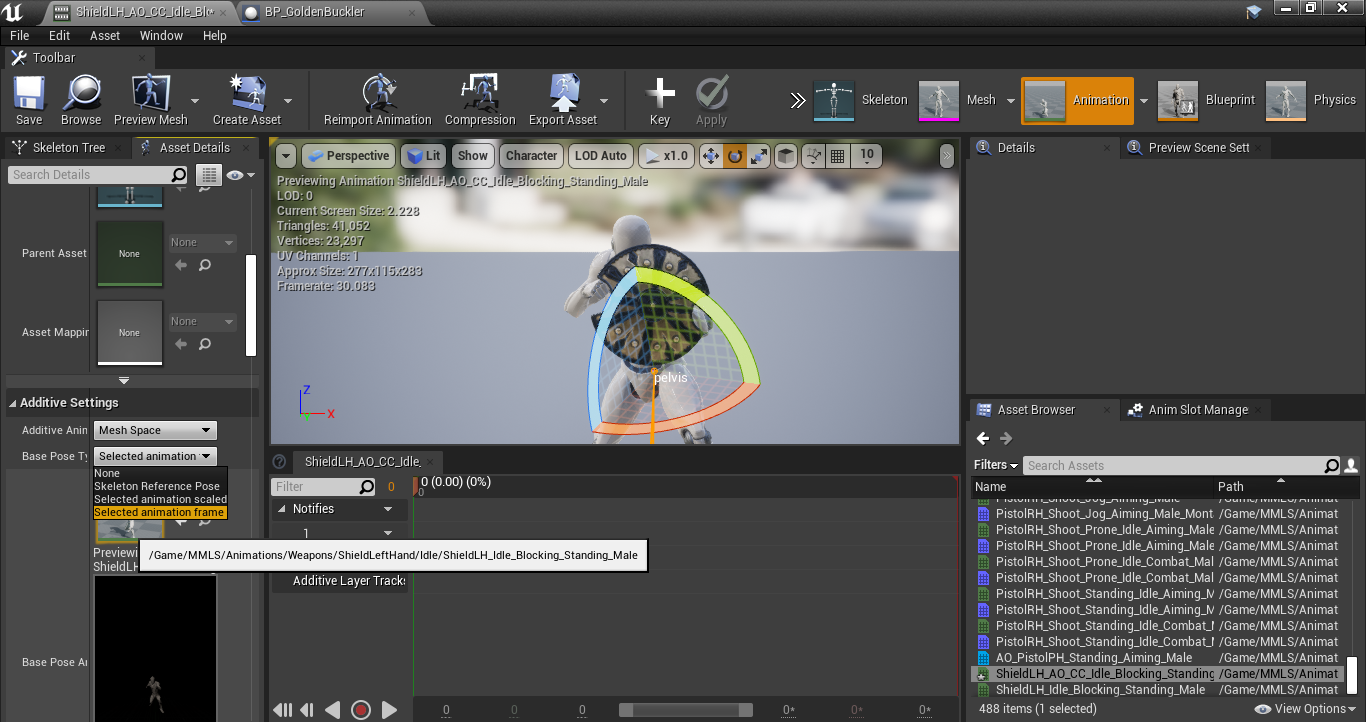
Step 5
Apply Additive settings to the AO pose
In Additive Settings, click on Mesh Space, Selected Animation Frame then select your Idle animation that you made the pose from.
For the remaining poses you can just duplicate this AO CC and you will not have to do this again.
Step 6
Test your AO CC real quick in-game
Check if everything is working as intended. The camera in MMLS has a little offset to it, you might need to add a little offset to the right in your AO_CC.
Do NOT edit the idle animation. Always keep all your animations facing the Y axis. Only do your modifications in the Aim Offset poses. The head is moved toward the right with the Aim Offset.
You may need to go in-game a couple times to get this just right and have your character facing exactly where the camera points to.
Step 7
Set a new aim offset pose
After duplicating your AO CC pose, select a bone and rotate it a bit. Click the + to add a key (make sure the cursor is at time 0) or just press the S key on your keyboard. We recommend doing Spine01 to Spine03 and then neck and head. After that you can place the arms correctly.
This step is the hardest and will require some animation skills. If that is not your thing don’t worry we will pack some weapons in MMLSE and the shield anims here will be there soon.
Pro tip : Select your UpperArm Twists and type 0 0 0 in Rotation. This will reset the twists and you can see the shoulder better to place the clavicle. The clavicle is really the most annoying part. Set up your twists back again after positioning the arm at the right spot with the UpperArm & LowerArm.
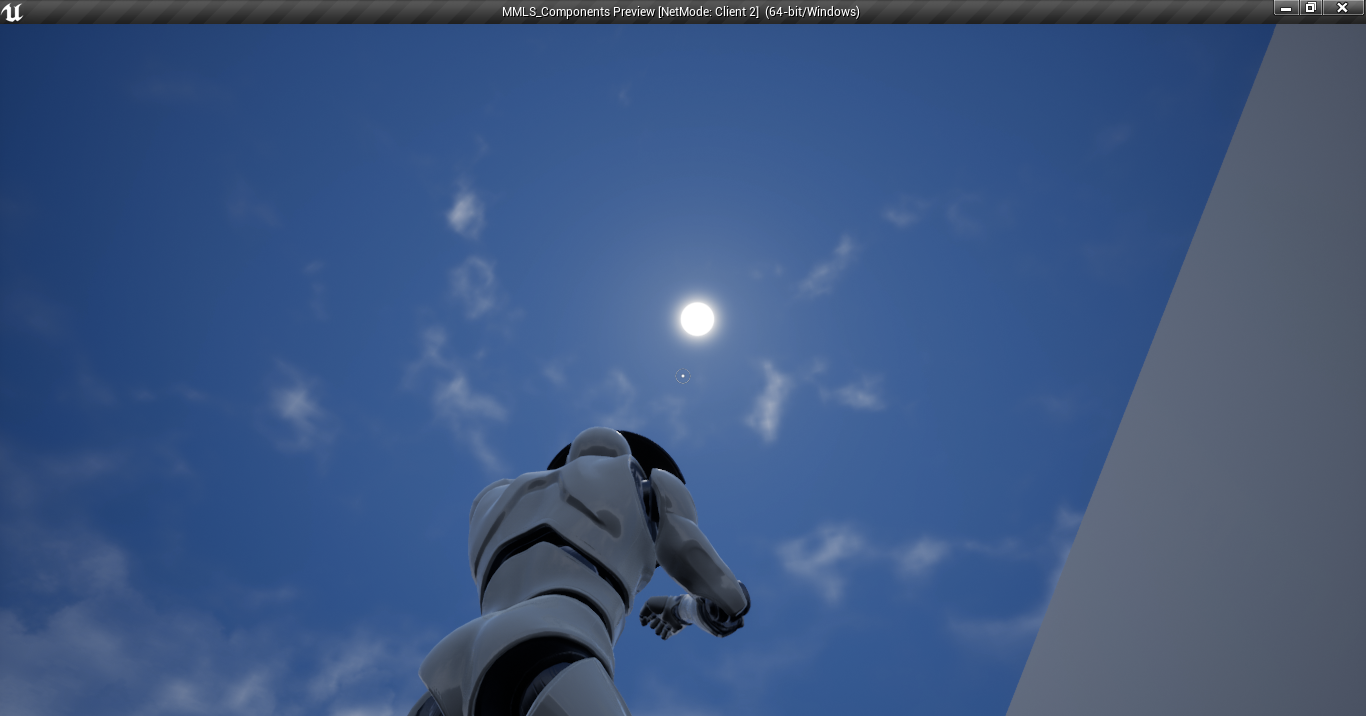
Result for our AO CU
Note the slight offset to the right to align with the camera in-game.
You can now protect yourself from the sun 🙂 Note: the right arm here could be better. We can change its position in the aimoffset. Basically anything can be tweaked to your liking with this aim offset system.
Result for our AO CD
Note the slight offset to the right to align with the camera in-game.
This pose could be better too. We will work on it before including this in MMLSE.
Step 8
Repeat until you got all 9 poses. For the movement aim offsets, you only need to do CC, CU and CD. The Yaw Offset is always 0 when moving. You will probably need multiple passes in-game to tweak your Aim Offset until it is really like you want it. If you aim for realism in your game, it will be well worth it. Good luck!
Note : Make sure your turn in place montages for Aiming are on the Lowerbody slot. Otherwise if you play a full body turn in place montage while blocking it will blend in and mess up the whole thing. This is the same as we did for the pistol to keep the upperbody steady while aiming and turning in place.